Night 1: Pastry

IMG_1532

Welcome to my first post of my kitchen adventure at the Waterhouse restaurant!
IMG_1490

I was posted at the Pastry corner with Chef Timoney who taught me a great recipe to make foccacia bread, and also how to make Tuiles, mango ice-cream, mango panacotta, and how to cook the perfect chocolate fondant! I did not get all the recipes for you but my favourite of the night can be found below: the focaccia!

I have made foccacia once at home, and it took me the whole day. Timoney showed me how to make this light and fluffy bread in 2h. I was gobsmacked! I will try to repeat this at home and will keep you posted on how I am getting on without their amazing equipment. What helped us the most was to be able to proof this bread on top of a really hot oven. It was so hot that I could just about put my hand on it to feel how hot it was: I would say about 45/50C.

Ingredients:

  • 1kg bread flour
  • 1/2 tbsp salt
  • 3 tbsp fast action yeast
  • 1 tbsp caster sugar
  • 1 handful chopped fresh rosemary
  • 1 handful chopped fresh thyme
  • 2 tbsp on dried oregano
  • 450ml tepid water
  • 100ml extra virgin olive oil
  • 100ml pomace olive oil

Place all the dry ingredients in a standing mixer with a dough hook and add the oil and water mixed together slowly until you have a dough that comes together. We needed to add a few more drops of water to have the perfect consistency. You need a dough quite moist but that can be held without sticking all over your hands. Place the dough on a floured surface and knead it for a few minute.

IMG_1492
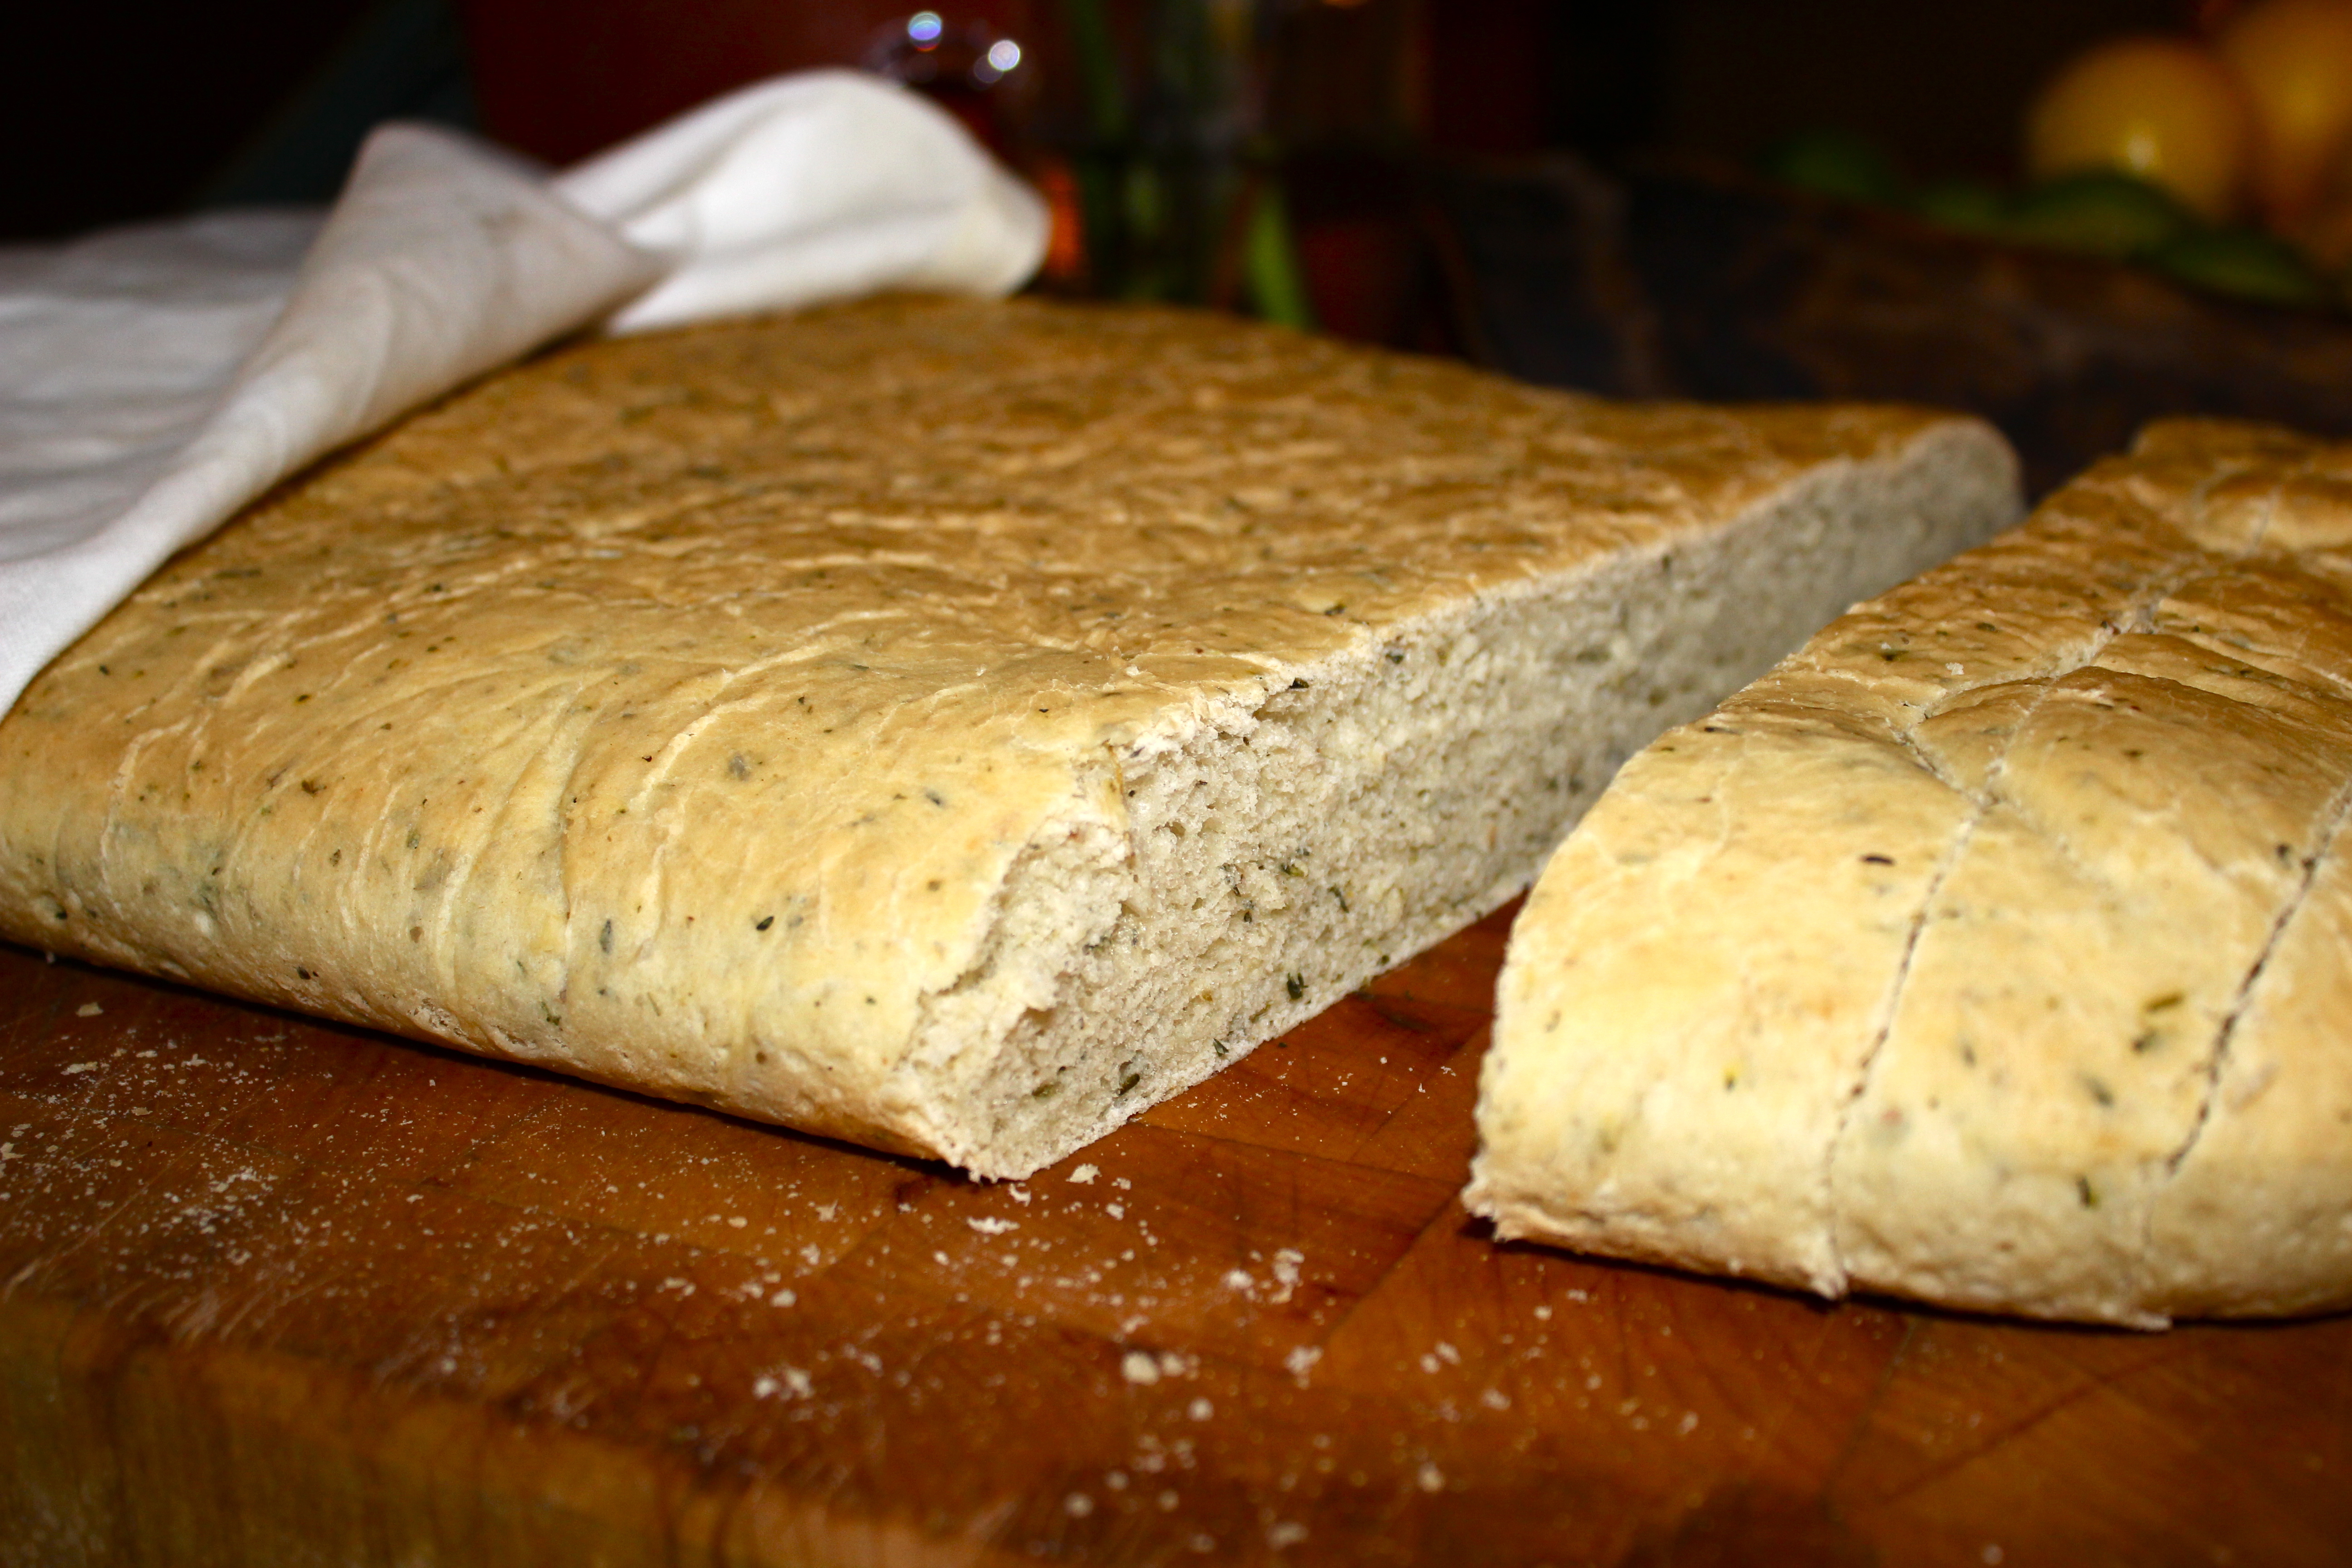
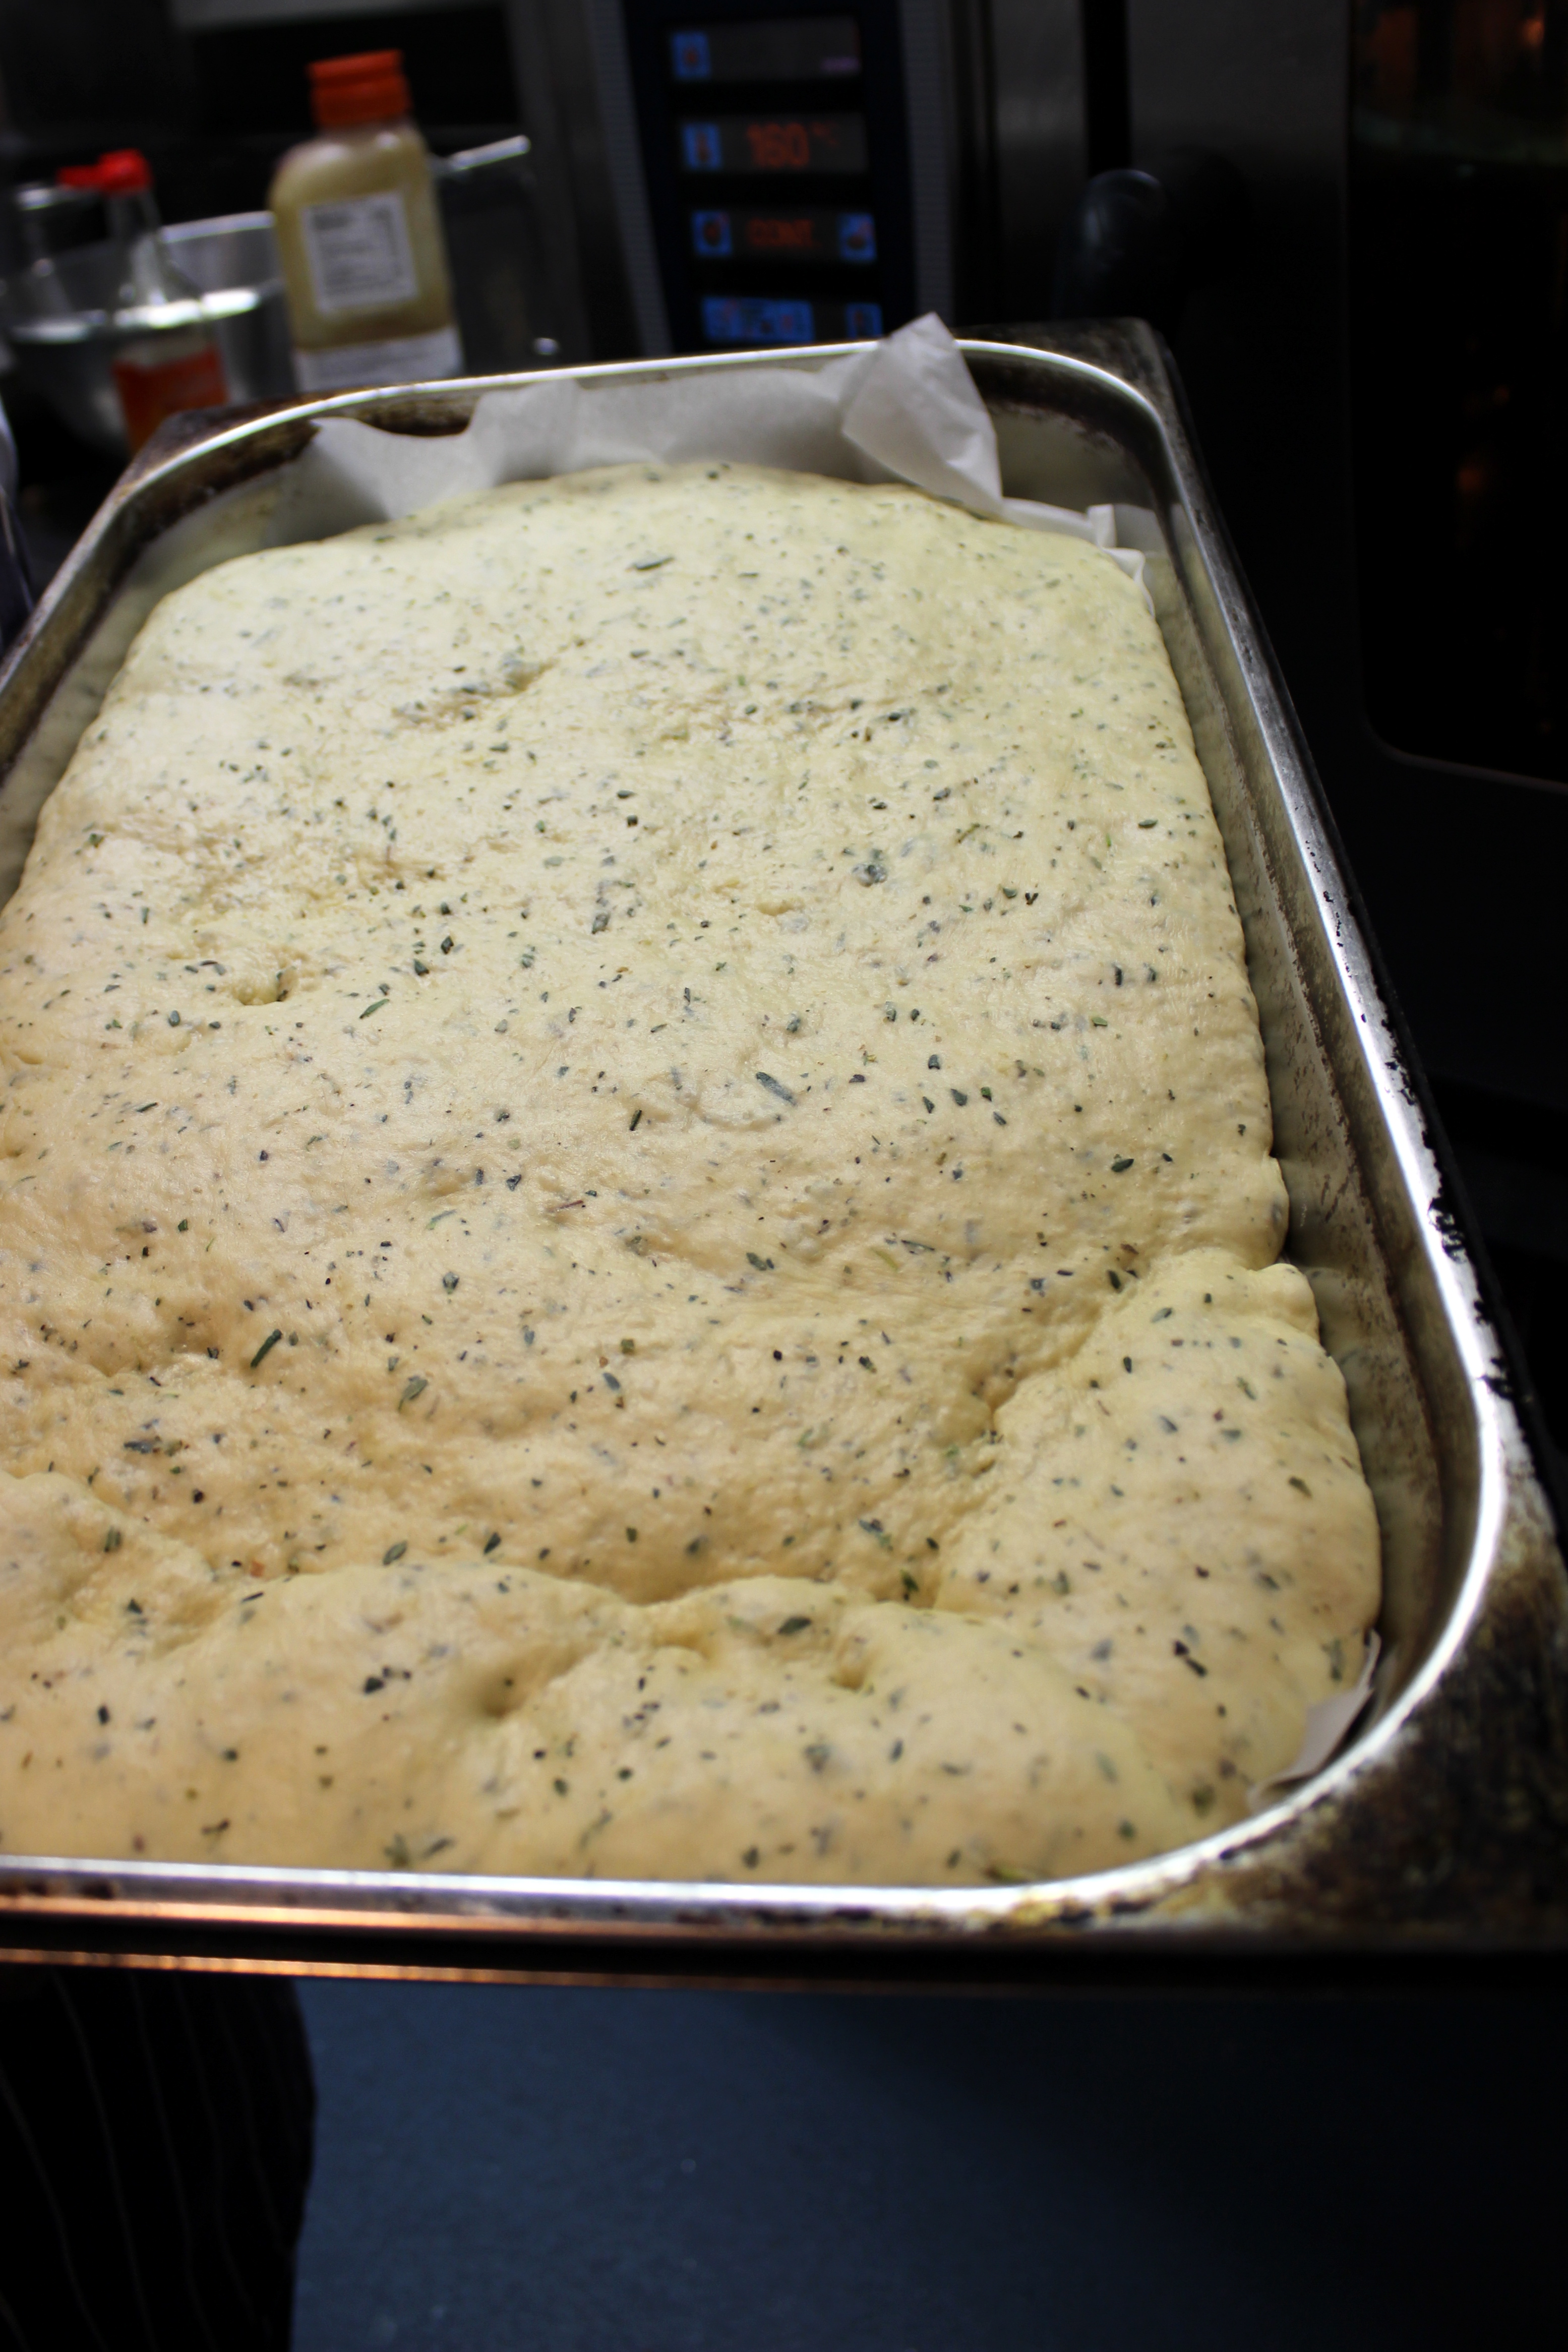
Place the dough in a super large tray covered with baking paper and leave to proof on top of a super hot oven. We left it for 1h and it looked amazing! You could tell the dough was fragile and has risen too quickly because as I was taking the picture one of the corner already started to collapse (as you can see on the picture on the right). We quickly put the tray in the oven at 170C for 20minutes until golden. The top crust should feel firm to the touch and the bread should feel soft, springy and hollow inside. I just couldn’t wait to taste this focaccia! I was surprised the chef didn’t brush olive oil on top of the bread before cooking to give it a good shine. They said some customers complained it was too oily so they now decided to leave the bread as it is and serve it with olive oil and balsamic vinegar. So soft, fluffy and herby. I didn’t need to be dipped in oil to me!

I will try this recipe as soon as I get my kitchen dust-free from the renovation work we’ve been doing and I will keep you posted! Although I might try a smaller version first…

IMG_1529

IMG_1519

So many things were going on that it was hard to keep up with the camera but I thought I would focus on the chef who was in charge of the kitchen that night: Daniel. A very calm and brilliant young chef who just got a new chef position at the Duck&Waffle. He showed me his presentation on their beetroot and gin-cured salmon and how he prepares my old time favourite scallops. Loved it!

IMG_1497

IMG_1545

IMG_1536

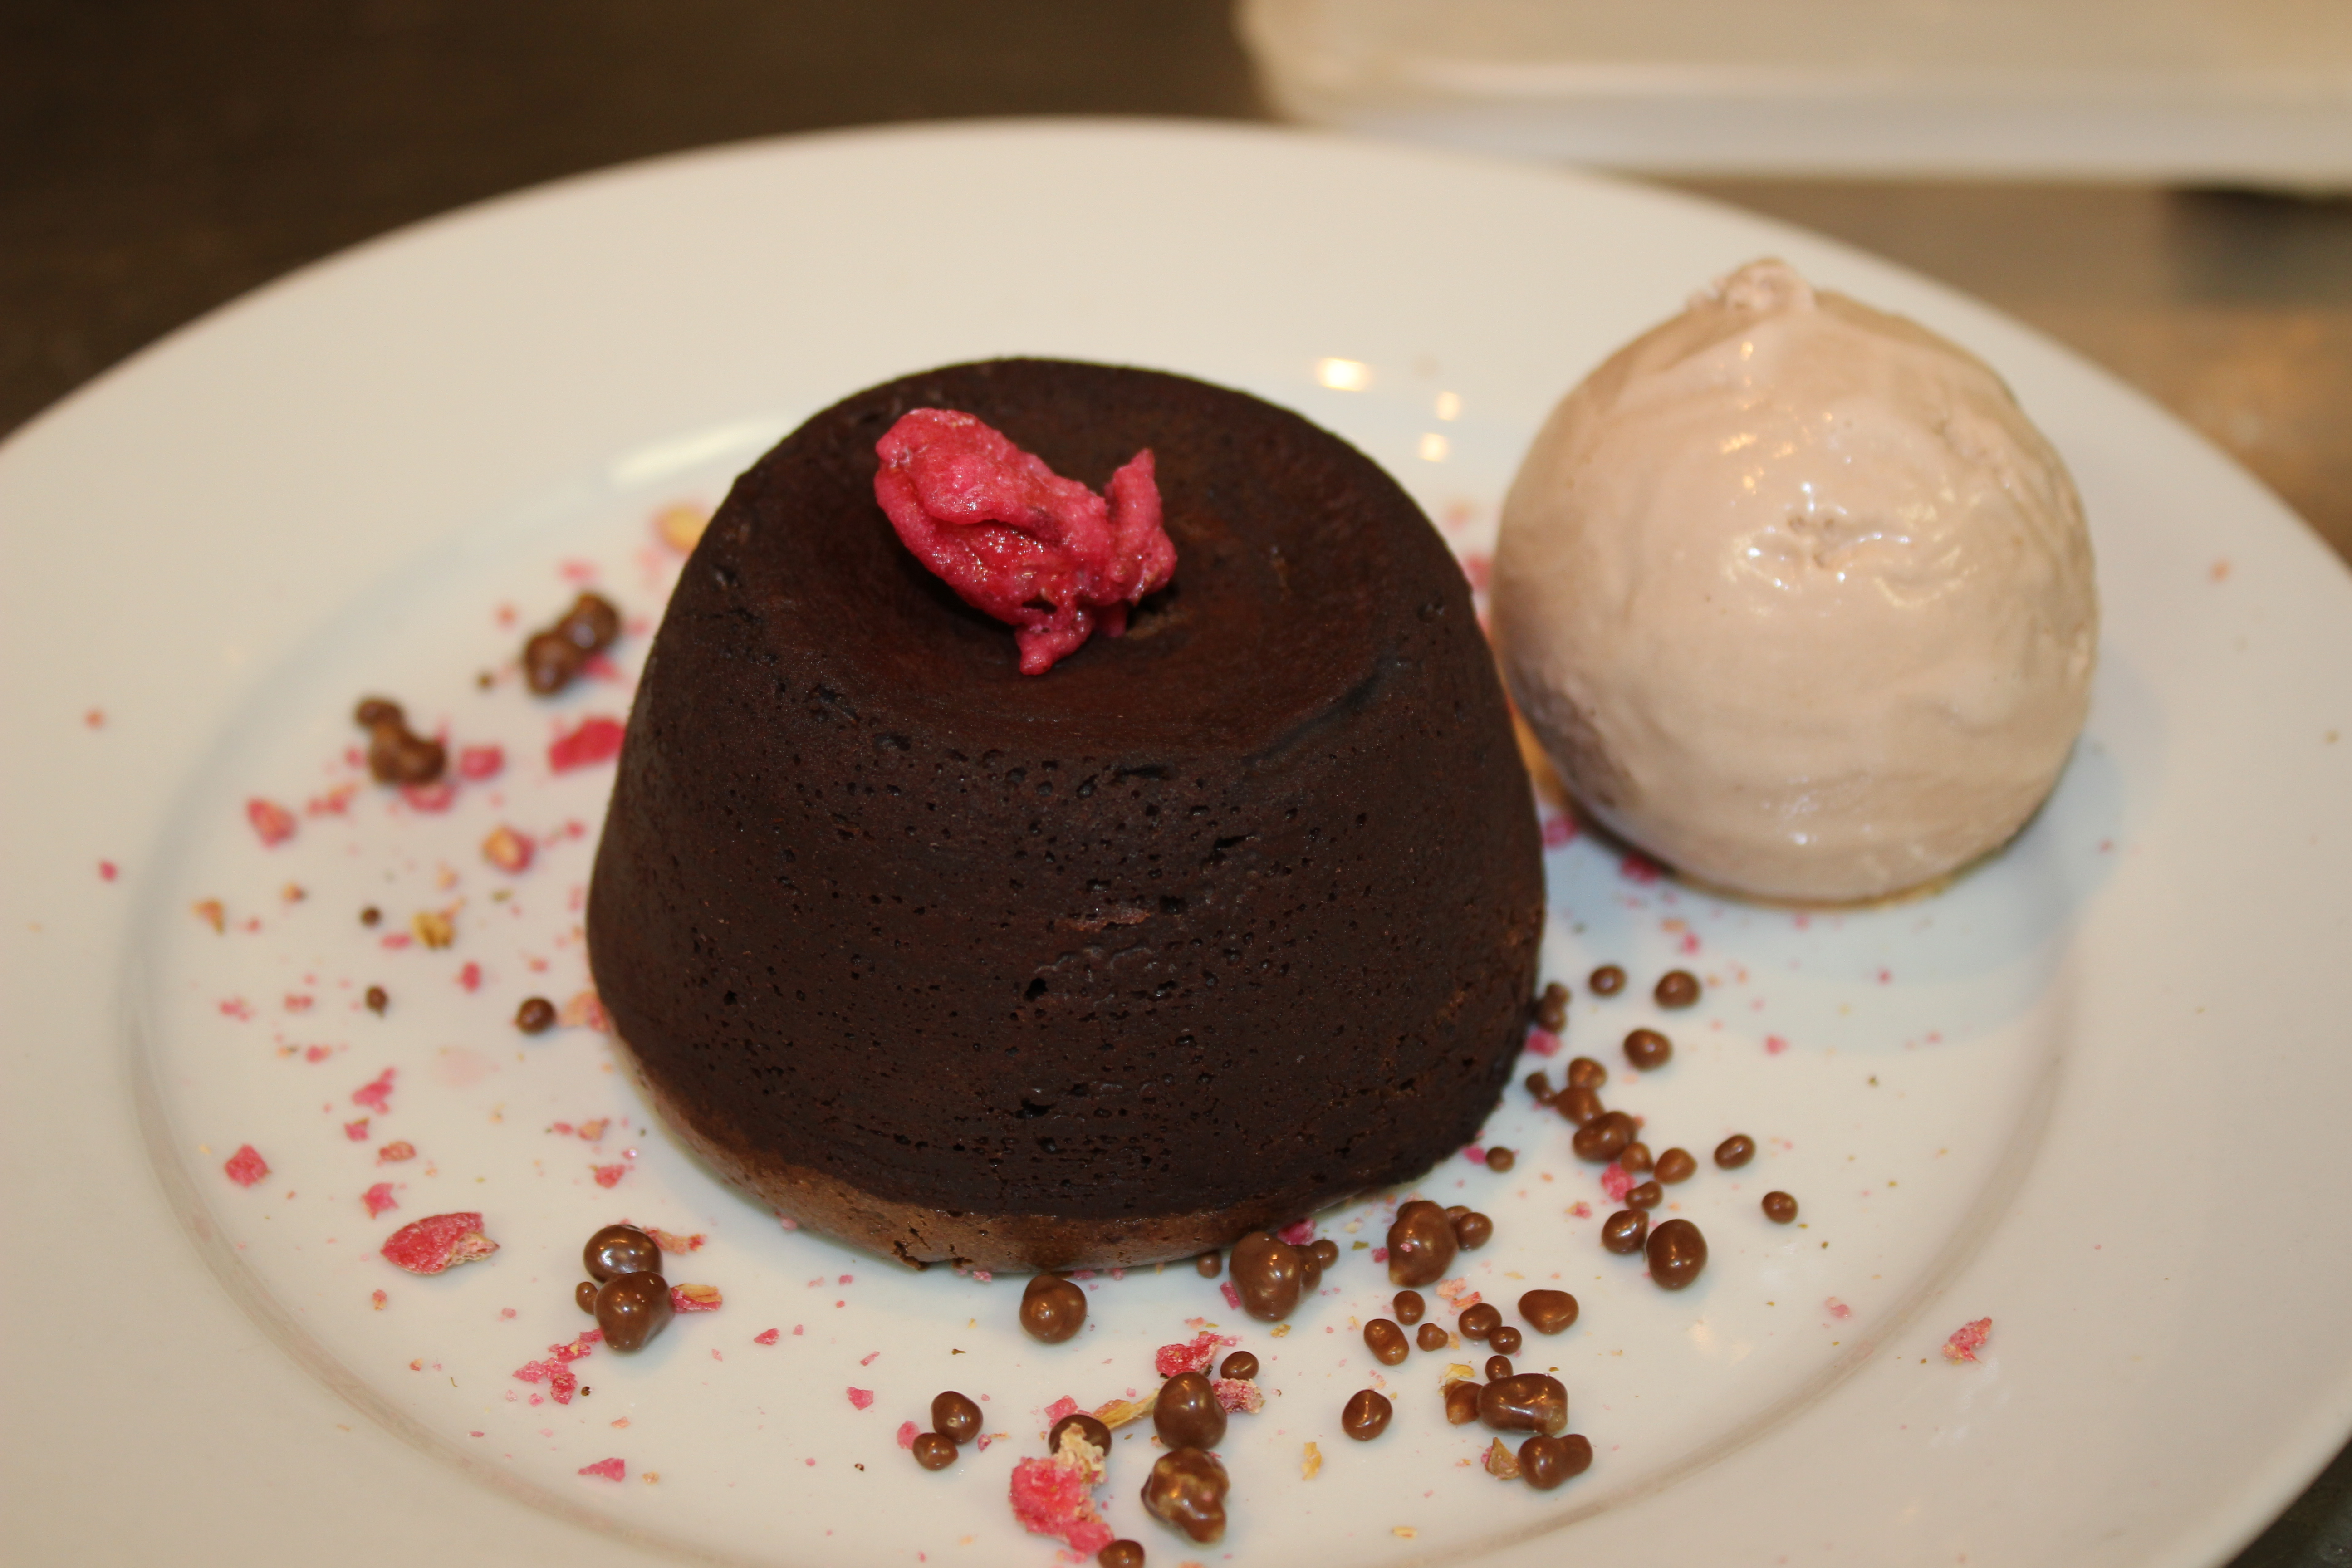
Making french tuiles seemed so scary to the contestants during the Great British Bake Off this summer that I thought it would be very hard. Well it isn’t really, not when you have Timoney watching your palette knife skills and making sure you don’t overcook them so they dry too quickly. I also “helped” preparing the dessert. By helping I mean taking the home-made hazelnut ice-cream tub out of the freezer and decorating the plate with the crystallised rose. Hard work, I know. The whole night went by far too quickly and I really hope I behaved myself well enough to be allowed to come again!

IMG_1493IMG_1541

Celebration cake: Toasted marshmallow and ginger cake

This cake was served at midnight on New Year’s eve covered with sparklers. This was our second wedding party with our friends and after the decadent meal we had I needed to finish off the meal with fireworks! This cake feels very wintery with the heavy ginger flavour, and perfect for celebrations with the blow-torched marshmallow icing. It is one of my husband’s favourite cake and it was a real hit with our guests.

IMG_0830

This recipe is from my BBC Good food magazine and is now online here. This recipe produces a cake too small for our 20 guests so I decided to go for a two-tier cake. This recipe just filled my 15cm round cake tin, and I doubled it for the bottom 23cm cake.

IMG_0759

The recipe asks for 4 stem ginger balls for the buttercream. The first time I made this cake I didn’t have time to hunt for this ingredient and decided to make my own so I’ll have the confit ginger and the syrup at the same time. It takes a bit of time but it is very easy.

Peel 3 big chunks of fresh ginger and chop it into small bits (or use a food processor). Simmer the ginger for 45 minutes in half a litter of water until it softens. Fish out the softened ginger and set aside. Measure the liquid left and add double the amount in granulated sugar, then put it all back in the pan and mix well to dissolve the sugar. Let it simmer until it thickens, then add the ginger back in the pan and here you have confit ginger with ginger syrup. You can fill clean jam pots to the top with the hot mixture, close the lid and turn it upside down. Let it cool and you can store it for months!

I love the spiciness of ginger and really wanted to give a kick to my buttercream so I used lots of this confit ginger while mixing the buttercream. Constantly taste your buttercream until you have achieve the desired level of heat.

For tips to build up a two tier cake, have a look here at my previous wedding cake post.

One tip for the marshmallow icing: Do not leave it too long at room temperature before blow-torching it as it might slide off the cake. As soon as you it is blow-torched, the marshmallow will keep its shape and the cake can be stored at room temperature until served.

Tropical winter Sunday dinner


We decided to crank up the heat and go tropical this Sunday! My beloved BBC Good Food magazine had some pretty amazing looking recipes and we decided on a tropical combo with Pineapple/pork skewers, a Beef and Banana curry with cashew nuts rice and a pineapple cake. My husband helped for the savoury dishes and we had a fantastic meal. I even made these place mats by recycling our window blind to go with the tropical theme (have a look here to see how I did it in details).

IMG_1273

Pork & Pineapple skewers with chilli glaze

The highlights of the meal was the Pineapple and Pork skewers with hot chilli glaze! I love roasted fresh pineapple, it reminds me of Dinner by Heston Blumenthal and their roasted pineapple dessert, so yummy. This recipe asks for Ancho dried chillies, cider vinegar and onions which we’ve swapped for: 1 normal fresh chilli and 1 very hot small chilli we grew last year, red onions and white wine vinegar. They also advise to serve it with a fresh lime, onion and coriander salsa, which we skipped. It was so good I can’t wait to eat the leftovers tonight!

IMG_1277

Ingredients for 3 hungry people:

  • 1 pork fillet, about 400g
  • 1 small pineapple, peeled and cored
  • 5-6 wooden skewers

For the glaze

  • half a normal red chilli and 1 small and hot red chilli
  • 2 medium red onions, cut into thick slices
  • 8 garlic cloves, unpeeled
  • small pack coriander, stems only (set some leaves aside for decoration)
  • 120ml good-quality white wine vinegar
  • 8 tbsp soft brown sugar

To make the glaze, soak the chillies in boiling water for 15 mins. While they’re soaking, heat a large frying pan (no oil is needed). Add the onion slices and garlic. Season and let blacken on a medium-low heat for about 15 mins. Turn everything so all sides blacken. I know it sounds weird but trust me it will be DELICIOUS! When the garlic is blackened, peel it. Add it to a food processor with the charred onion, chillies, coriander stems, vinegar, sugar and a good measure of salt. Blend until smooth, then scrape into a bowl.

Slice the pork and pineapple into cubes. Thread them onto the skewers and brush liberally with the glaze. You won’t use all of it, but save the rest as a sauce for serving.
Heat a grill to high. Grill the skewers for 5 mins each side until chargrilled. Let them rest for 5 mins under foil, then serve with the remaining glaze.
Beef, potato & banana curry with cashew rice
We’ve followed this recipe word for word. Tasting the sauce during the preparation did not impress us at all, it felt like something was missing and it was very watery. But we patiently waited until the end and after reducing the sauce in the oven for 30 minutes, we could finally taste the creamy curry-heavy delicious sauce. I would change two things to this recipe: first, halve the potato amount as it is already carb heavy with the rice. Second, they say to taste and season AFTER adding the bananas, but I would recommend to season BEFORE otherwise you will mash up the bananas when mixing the salt in. I added an extra tsp of salt and an extra tbsp of sugar at the end.IMG_1249
Ingredients for 6 people:
  • 2 tbsp sunflower oil
  • 800g stewing beef cut into chunks
  • 2 onions, chopped
  • 2 lemongrass stalks, bashed
  • 2 tbsp grated ginger
  • 2 tbsp tamarind paste
  • 3 garlic cloves, crushed
  • 1 tsp ground turmeric
  • 2 tbsp curry powder
  • 2 tsp brown sugar
  • 400ml can coconut milk
  • 500g new potatoes, halved
  • 2 large underripe bananas, cut into big chunks
  • 2 tsp garam masala
  • some coriander leaves for decoration

For the rice: 300g Basmati rice, 100g cashew nuts, toasted for a few minutes

Heat oven to 160C fan and heat half of the oil in a large casserole dish. Brown the beef in batches if needed. Add the remaining oil, with the onions and fry gently until softened. Stir in the lemongrass, ginger, tamarind, garlic, turmeric, curry powder and sugar, and fry for a few minutes. Add the coconut milk and a can of water and bring to a simmer. Cover and place in the oven for 1h.
Then stir in the potatoes and cook for another 1h, removing the lid halfway.
Taste and season to your taste (salt and sugar for me), then add the bananas and garam masala and let it cook for an extra 10 minutes. Meanwhile cook the rice and serve it with the roasted cashew nuts slightly bashed.
Cinnamon pineapple upside-down cake
This recipe is from my January issue: a beautifully light sponge cake with a caramelised pineapple top, absolutely loved it! I reduced the butter from 200g to 140g due to unexpected shortage and it was still fabulous! Keep most of the butter for the sponge and fry your pineapple cubes in the smallest amount possible. We tasted it both warm and cold and we preferred it cold
IMG_1236
Ingredients:
  • 140g unsalted butter, softened
  • 125g soft brown sugar
  • 1 tsp ground cinnamon
  • 1½ tsp vanilla bean paste
  • 1 pineapple, peeled, cut into quarters, core removed, then cut into 2cm slices
  • 140g golden caster sugar
  • 2 large eggs, plus 1 egg white, beaten
  • 1½ tsp baking powder
  • 200g plain flour
  • 75ml whole milk


Heat oven to 180C/160C fan/gas 4. Put 2 tbsp of the butter into a 22cm springform cake tin and place in the oven to melt. Remove and stir in the brown sugar, cinnamon and ½ tsp of the vanilla paste. Arrange the pineapple in the buttery sugar mixture, tossing a little to coat. Try to fill all the gaps, so you can’t see the base.
In a mixing bowl, beat the caster sugar and remaining butter using an electric hand whisk for 2-3 mins until light and fluffy. Add the eggs and egg white, one at a time, and the remaining vanilla. Add the baking powder and a pinch of salt, then the flour and milk, beating until they are both incorporated. Beat for 1 min more until smooth.
Spoon the batter into the pan over the pineapple. Bake for 1 hr, covering with foil if it starts to brown. Leave to rest for 5 mins, then turn out onto a platter and serve warm as a pudding, with crème fraîche, if you like. Alternatively, leave to cool completely in the tin and serve as a cake.