Our wedding cake had to be made with ingredients we both loved! We picked our favorite cake at the time (it constantly changes…) and I tried to make a two-tier cake with both of our choices. Choosing the cake, baking it and building the whole thing was not the main worry for me. The issue was the final touches as we don’t really like sugar icing. I wanted chocolate and lots of it!
The plan was to make a Jaffa cake for the bottom cake: Orange infused sponge cake, with my own Seville Orange marmalade in the middle and covered with a glossy dark chocolate ganache. The top cake would be a polenta cake, with strawberry jam and covered with white chocolate ganache. Once built, the cakes was going to be surrounded by home-made white chocolate barks. I added some berries already used for my centrepiece to hide imperfections, 2 heart-shaped pieces of slate on the top and here is the result:
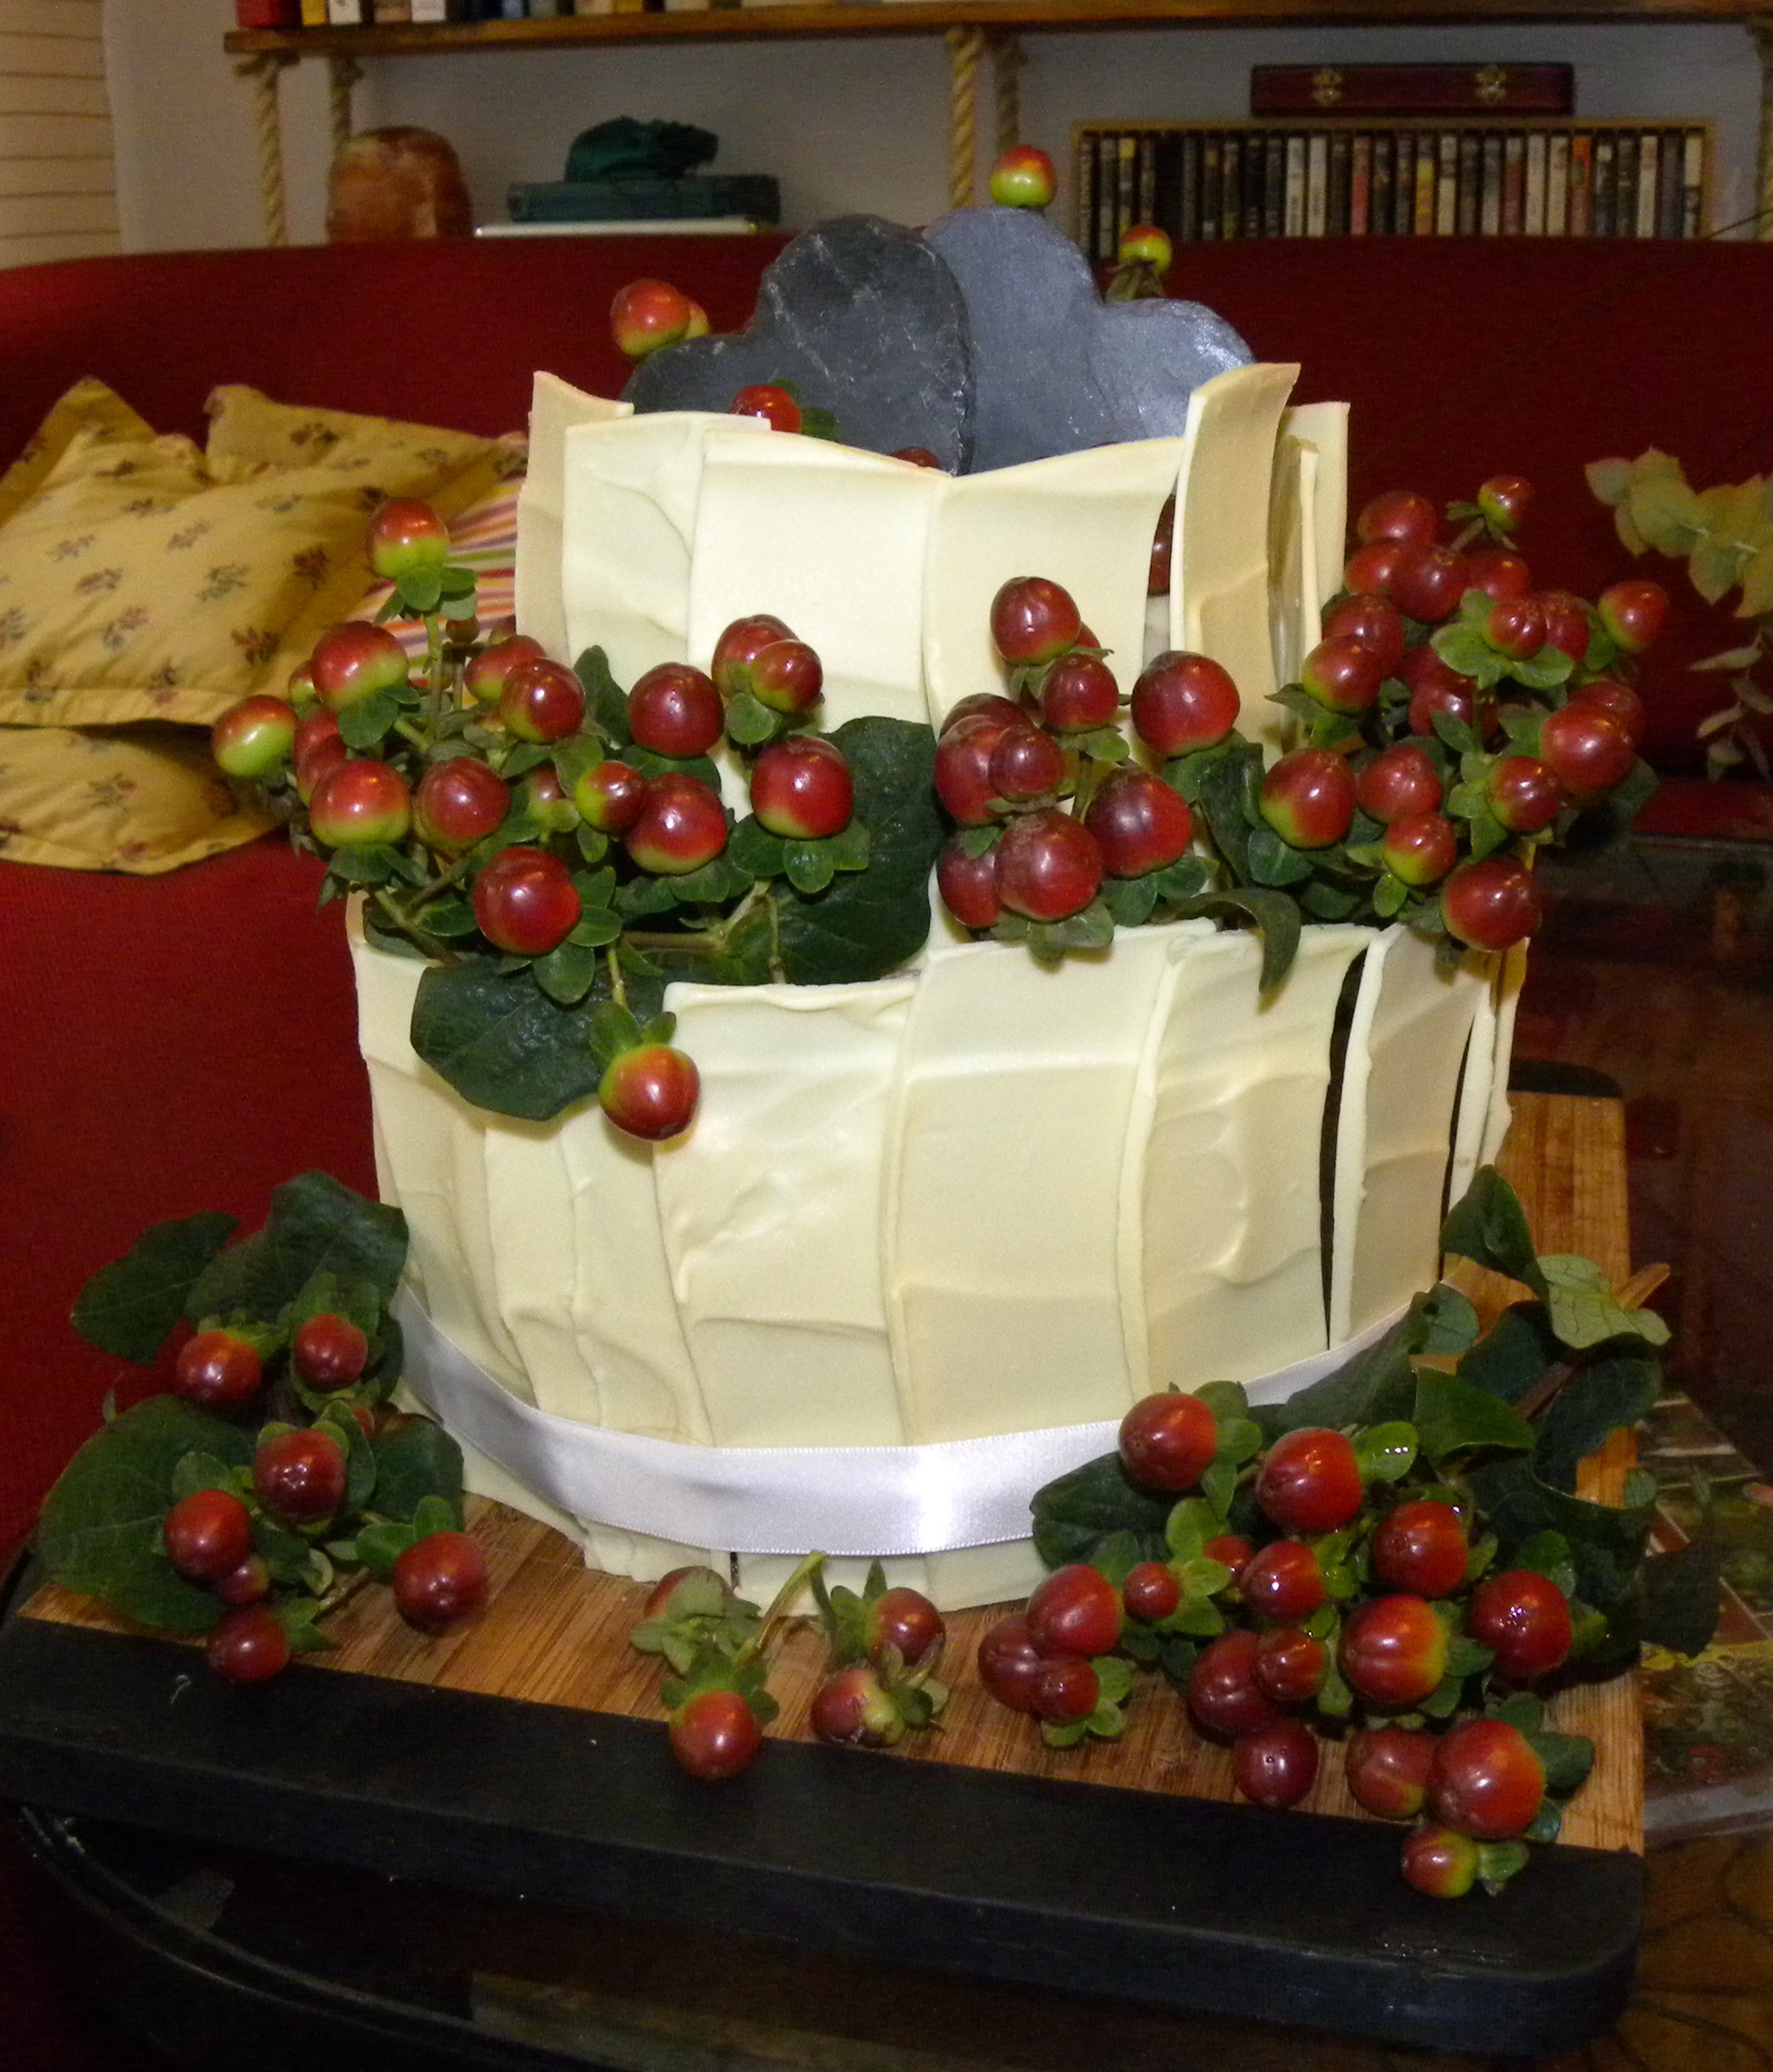
I regret not to have taken more pictures, this one really doesn’t do it justice at all. And I also didn’t take pictures of the transitions during the making of the cake but this site really helped me and I will try to write as much detail as I can to help you.
RECIPES
Equipment needed: one or two 23cm and 15cm cake tins, 2 round cake boards the same size as your tins, some wood rods and a palette knife.
I recommend to prepare the white chocolate barks in advance as it will take quite some time and you can store them for weeks in the fridge. I did my chocolate barks following these 3 steps:
WHITE CHOCOLATE BARKS
– Melt 500g of white chocolate in a bain-marie until it has reached 43C and then transferred it to a clean and dry bowl. Have 2 big baking trays covered with baking sheet prepared and set aside, and make sure they fit in your fridge! When the chocolate looks “cooler” and has thickened a bit, pour it onto the baking sheet and spread it with a palette knife to the desired thickness. I opted for thick barks because it was easier to control the hardening of the chocolate. Spread the chocolate to form a rectangle with a width much longer than the height of your cake, I went for 20cm. Place the tray in the fridge.
– Constantly check your chocolate. When it feels like a soft paste rather than a liquid, take it out of the fridge and cut your barks (mine took about 20minutes). The knife will go right through it and it won’t look like you’ve cut anything, but this is more of a “pre-cut” and it will make your life SO MUCH easier when the chocolate has set. With the knife draw a rectangle with curvy lines (so the cake doesn’t look too serious) and measure the width to make barks slightly taller than then cake (15cm for me). Now, if desired, add some little twirls on the barks if desired, or more advanced drawings, but be fast because the chocolate might soften again. Once done, cut the barks and place the tray in the fridge for at least overnight. I tried to draw it to help you with the pattern and the description. I managed to do 40 barks that way, which was enough to cover the whole cake.

– The next day take your chocolate out of the fridge. The pre-cut marks should still be there and they will be used as a guide to cut your barks. I started with a knife retracing the marks but quickly realised that the barks were detaching themselves quite easily one from another by bending them gently. Once all your barks are detached, store in an airtight container in the fridge for weeks.
JAFFA CAKE with home-made marmalade and dark chocolate ganache
This cake’s recipe is adapted from a recipe in my BBC Good Food magazine (July 2013). They’ve used orange jelly instead of marmalade and milk chocolate instead of dark chocolate. I made two of these cakes and stacked them up on top of each other with a good layer of marmalade in the middle.
For a 23cm cake tin, well greased with butter.
Ingredients:
- 250g unsalted butter softened
- 300g caster sugar
- 4 large eggs
- 100g yogurt
- 300g plain flour
- 2 tsp baking powder
- zest of 4 large oranges
- For mounting and topping: Seville Orange Marmalade, a pot of clotted cream, 300g good quality dark chocolate, 300ml double cream
I only have one 23cm cake tin, so I followed this recipe twice to create two identical cakes.
Turn the oven on at 140C fan. Add all the ingredients to a large bowl and mix with an electric hand-whisk until smooth. Pour it all in the tin and bake for 1h until an inserted knife blade comes out clean. Let it cool down for 10minutes, then remove the cake from the tin and leave it to cool down completely on a wire rack. Once cooled, you can keep the cake in a airtight container for up to 3 days.
The cakes will be hidden by the chocolate barks so it didn’t matter if it wasn’t perfectly round and the top perfectly flat. If the cake has created a substantial dome during cooking, then cut the extra to have a relatively flat top and do the same for the second cake. When the cakes have cooled down, stack them up with marmalade in the middle. Make your own Seville Orange marmalade or use some shop-bought marmalade. Be generous as the cake is very sweet and a little freshness and tanginess will be welcome.
I used clotted cream to fill the gap around the cake created by the two cakes put together. Clotted cream has a neutral taste and I just love it! Leave the cake in the fridge to cool, it will help the ganache to adhere. Prepare your ganache by heating the double cream in a pan. When the cream starts to form little bubbles (Do not boil it), pour it onto the chopped dark chocolate. Leave the cream on the chocolate for a minute or so and mix well until all the chocolate has melted. Place in the fridge for 30minutes. The ganache should be spreadable, but not too liquid otherwise it will slide off the cake. If you leave it too long in the fridge it will solidify but this is easily reversible by heating it back slowly. Cover the cake with the ganache and if the ganache is too liquid place it all in the fridge for longer and try to spread the ganache again. If the ganache is sticky and stays on the cake, you have achieved the perfect consistency! Keep in the fridge until your top cake is also ready.
POLENTA CAKE with strawberry jam and white chocolate ganache
My paternal grandma was italian and I used to spend my summer holidays in her family’s house in the italian’s Alps near Bergamo. A beautiful region for hiking, climbing and all kind of mountain activities. I started to go to this house when I was probably around 7, and all I cared about at that age was the cows in the field in front of the house that we could milk in the morning. THAT was fun! Growing up though meant that I had to participate to prepare the meals and this is one of the reason why you will find lots of Northern italian recipes on my blog.
Polenta is widely used in the North of Italy, which also gives the name Polentina to the ladies of the North. I have learned many recipes during these summer holidays cooking with my grandma, but as we didn’t have an oven, the only cake we would eat was the polenta cake from the neighbour. I remember this cake being warm, sweet and crunchy with little grains of polenta. This is the cake I tried to reproduce here.
Ingredients for a 25cm cake tin, or 2 smaller 15cm tins:
- 150g polenta
- 100g self-raising flour
- pinch of salt
- 1 tsp of baking powder
- 180g butter
- 200g granulated sugar
- 4 medium eggs
- 1 tsp of vanilla extract
- 200g yogurt
- For mounting and topping: Strawberry jam, clotted cream, 150g white chocolate and 150g double cream.
Heat the oven at 180C and grease a 25cm cake tin.
Melt the butter and mix it to the sugar. Whisk in the eggs one by one and the vanilla. Add the dry ingredients and the yogurt and keep whisking to have a very aerated mixture. Fill the tin and cook for 35 minutes or until an inserted knife comes out clean. This cake is delicious slightly warm and also very good a little stale dipped in tea 😉
For the wedding though, I split this recipe in 2 and filled two 15cm cake tin. Like for the Jaffa cake I trimmed the top and stacked them on top of each other with strawberry jam in the middle. Some clotted cream to hide the holes, and cover with white chocolate ganache, done the same way as for the jaffa cake.
MOUNTING AND DECORATING
When both of your cakes are covered with their respective ganache, place them on their cake boards. Cut 4 pieces of wooden rod to the exact height of the bottom cake and insert them evenly spaced in the middle: they will provide support for the top cake. Place the top cake firmly on top and place the white chocolate barks around. If the ganache is too cold the barks won’t stick well so make sure the cakes are at room temperature. Starting with the smaller cake, overlap the barks to hide the ganache and finish by the bottom cake. If needed, use a ruban to hold the barks together while the ganache solidifies again in the fridge.
Keep the two-tier cake in the fridge and place it at room temperature a few hours before being served. I went for berries and 2 heart-shaped pieces of slate to decorate it simply. But go ahead and add sparkles, food paint and some proper bride and groom figurines on the top!