Madeleines

2014-04-01 12.53.37

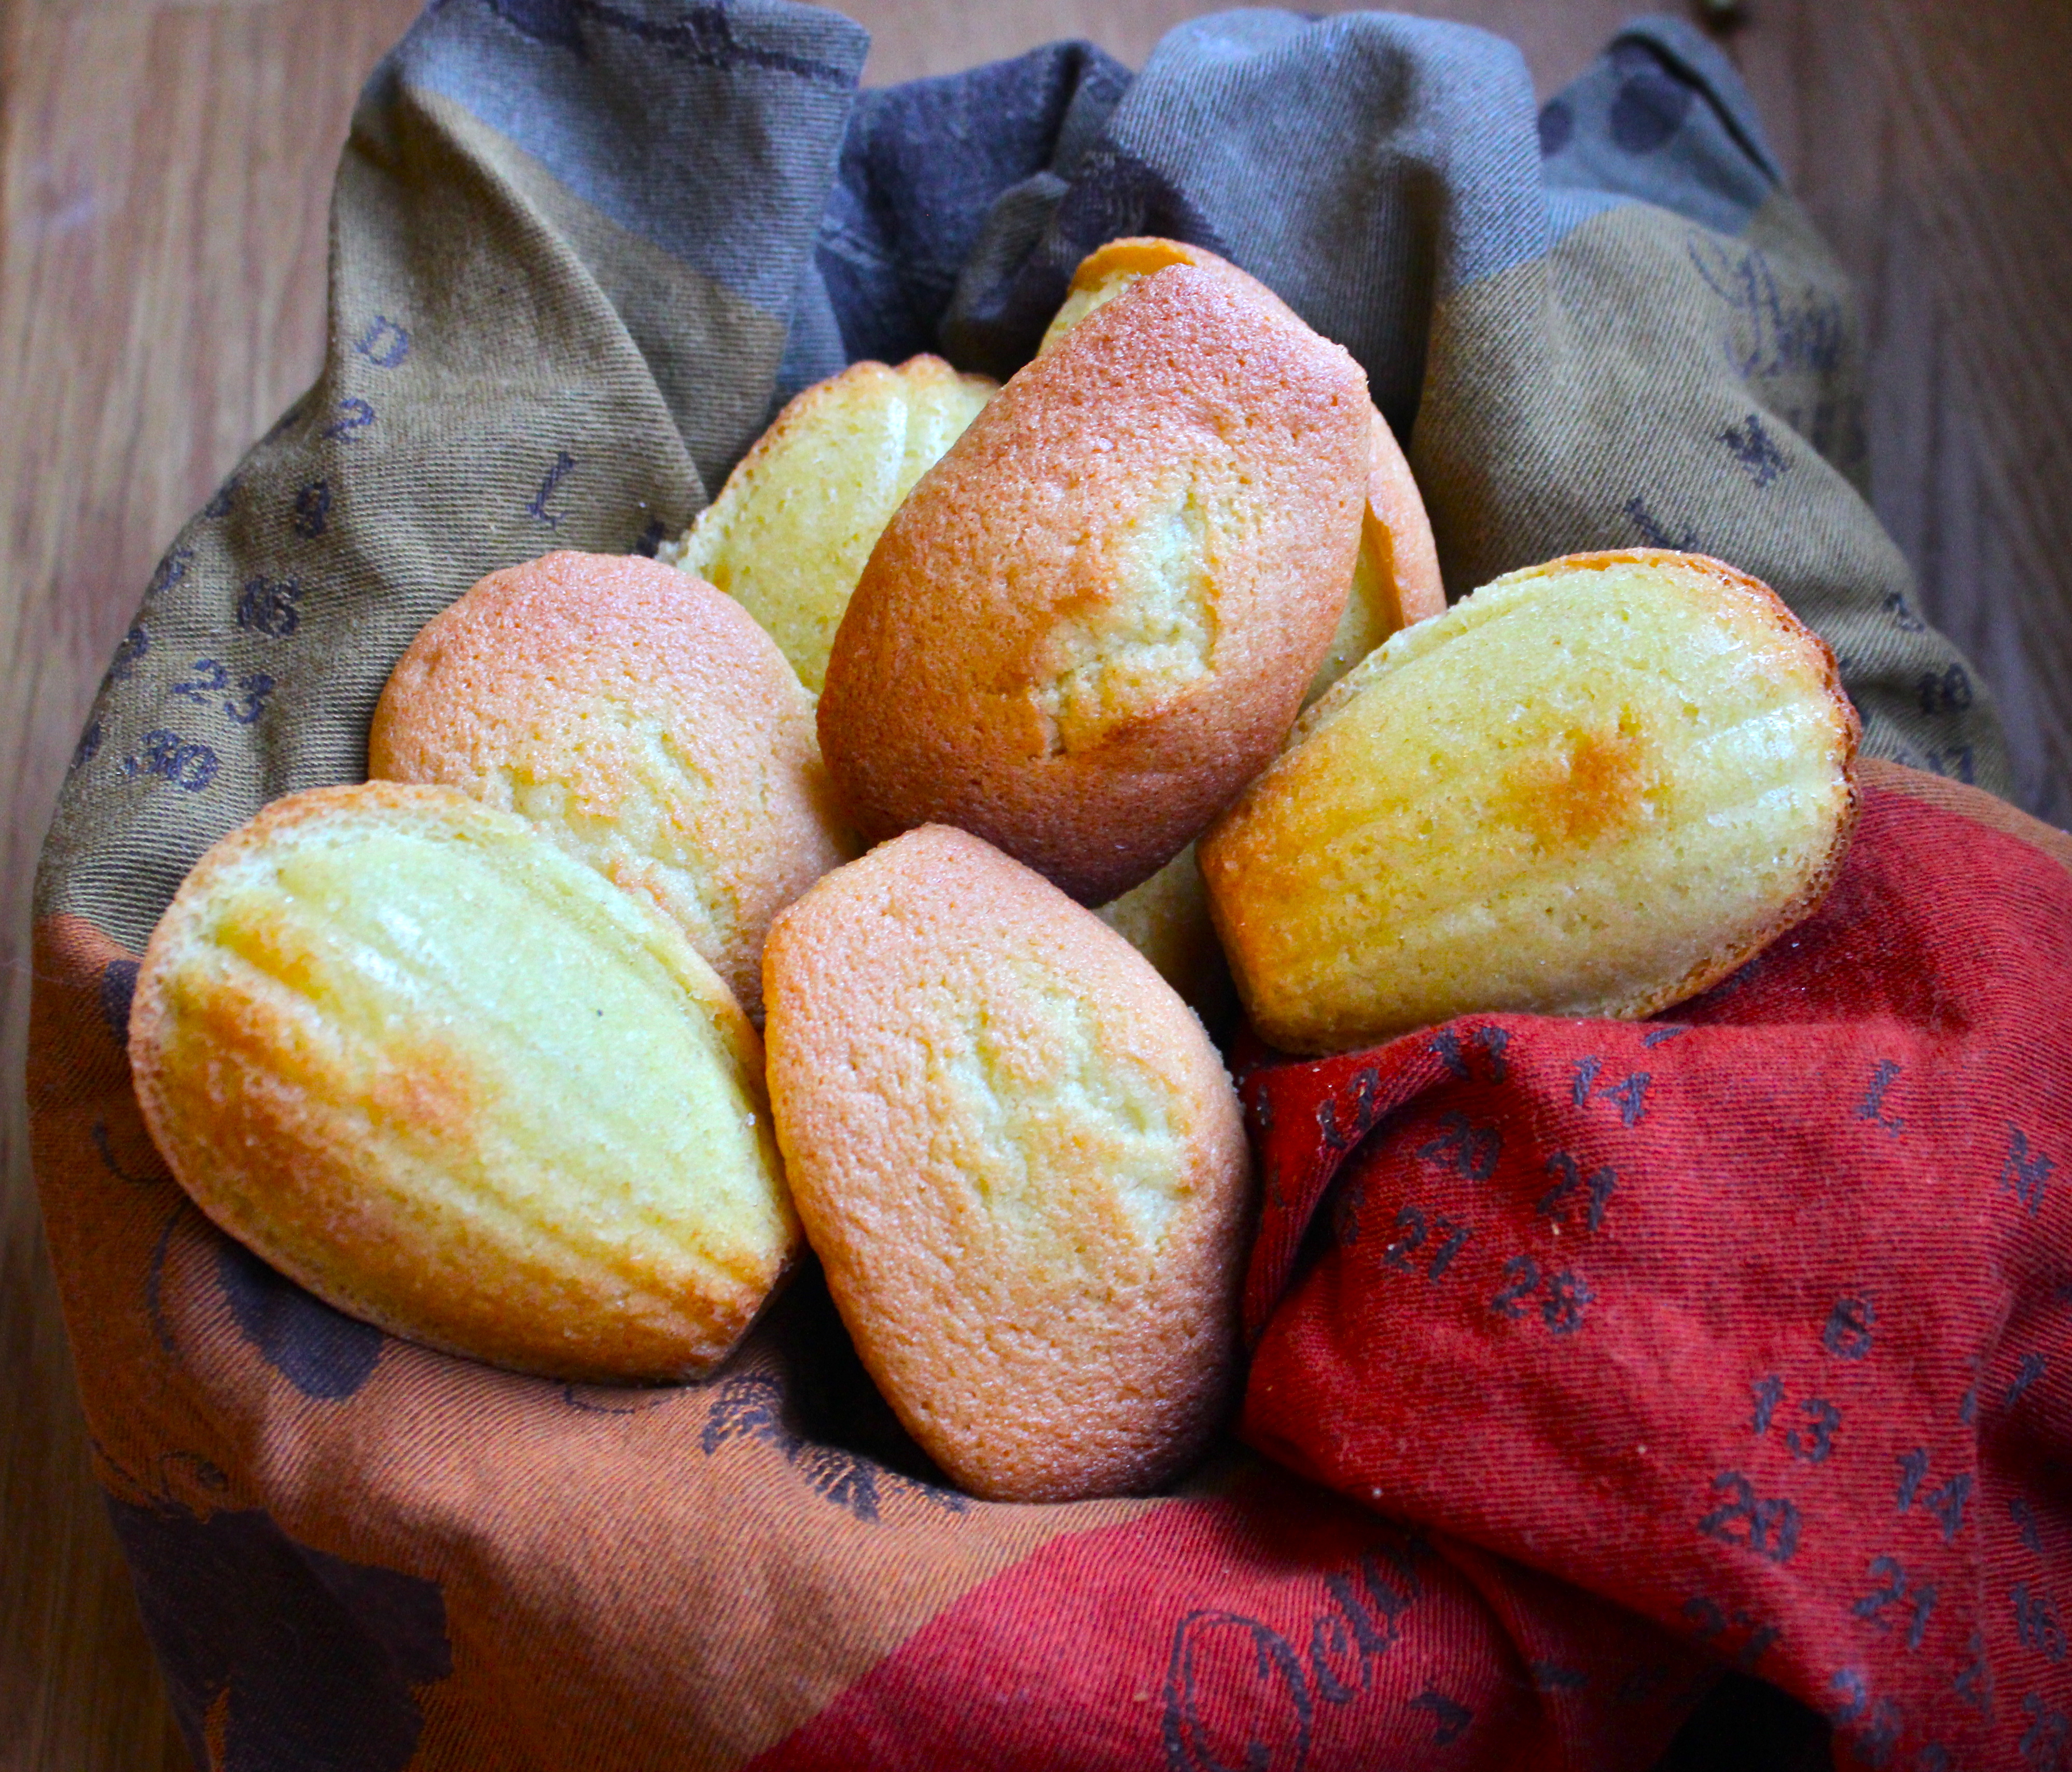
Madeleines are classic little French cakes. You can have them for breakfast, with tea or as a little “gouter” which is our 4pm cake snack for children in France when they come back from school. They should be light with a strong buttery taste.
I tried a recipe from my BBC good food magazine from Michel Roux Jr, but there were lemon Madeleines. Even though the recipe was a good base to start experimenting, classic madeleines should not be that lemony. So here is my version and I hope you will enjoy it. I used my work colleagues and my trapeze fellow learners as guinea pigs and they all loved it. Someone even asked if I had bought them!
One thing to keep in mind is that madeleines dry very quickly so always keep them in an airtight container. Or let them become stale and dip them in tea!


IMG_5199

Ingredients to make 12 normal size madeleines

  • 100g good quality slightly salted butter
  • 2 medium eggs
  • 100g caster sugar
  • 100g plain flour
  • 1tsp of baking powder
  • 2 drops of almond extract
  • Optional: remove 25g of flour and replace with the best hot chocolate powder you have. I used my hot chilli chocolate powder for this recipe.

Start by melting the butter slowly, once melted, make it bubble for an extra 5 minutes to cook it slightly which will give the distinctive madeleine taste. Set aside to cool down. Whisk the eggs and the sugar together until fluffy and pale in a bowl. Then mix in the flour, the almond extract and the baking powder and fold in the slightly cooled butter. Leave the mixture to rest for about 10 minutes. Brush some melted butter on the Madeleine moulds, if you don’t have any you can use little rectangle moulds. Spoon the mixture in the moulds up to nearly the top and let it rest for 15 minutes. Switch your oven on at 200C and when it’s hot bake the Madeleine for 11 minutes. They should look golden on the top and the edges should have a slightly darker colour. The top should be cooked and not sticky but still soft to the touch when pushed down. If you still had some more mixture in your bowl, cook them after your first batch is done..

Strawberry tower- Wedding lunch dessert

IMAGE-0493

Picture from our wedding photographer

Who doesn’t like the strawberries dipped in chocolate from the Christmas market!

We wanted a light dessert for our wedding lunch as we knew a massive dinner was coming in the evening, but I still wanted some wow factor and fruits and chocolate! A chocolate fondue would not have been very practical for 20 guests, especially if I wanted to keep my dress sparkly white!

I googled my idea and found some nice examples of the strawberry tower I had in mind. I bought a cylindrical polystyrene pyramid, a silver piece of fabric to hide the polystyrene, a packet of toothpick, some big strawberries, and white and dark chocolate bars. Try to buy strawberries roughly the same size, and loads of it! I bought them the day before to make sure they were as fresh as possible. Wash and pat them dry, make sure they are completely dry before dipping them into the melted chocolate.

Tip: Practice at least once before on a few strawberries. The tempering of the chocolate is not that easy at home, the mounting of the fruits is also tricky, and decorating the bride and groom strawberry is also quite hard. Make sure you’re happy with all this so you don’t ruin your beautiful strawberries on the day.

Tempering chocolate can be done at home, you just need to be patient. I bought belgian dark chocolate and white chocolate and followed the middle ground method to temper them. I have a normal cooking thermometer and it worked fine. Once you’ve achieved tempering temperature for each chocolate, make sure the chocolate cools down before dipping the strawberries in. Better loosing some shininess than cooking your fruits.

Have baking sheets ready, along with your toothpicks. Hold the strawberry firmly by the leaves and dip it in the chocolate of your choice, shake the strawberry to remove the extra chocolate, insert the toothpick through the tip of the strawberry and lie the fruit on its leaves, upside down, for the chocolate to set. The set chocolate will seal the toothpick to the strawberry.

DSCN6296

For the bride and groom strawberries, choose the two best strawberries you have. Dip the fruits in the chocolate by first coasting one side, then the other one trying to create a triangular cleavage with the chocolate. These 2 strawberries should be perfect looking from all sides, so hold them down until most of the extra chocolate has dripped off and then add the toothpick. A spare piece of polystyrene could really help here to insert the toothpick while the chocolate sets. I didn’t have one so I just kept holding it until the chocolate was set. Wait for the chocolate to set completely to start drawing the pearls with a toothpick, the bow-tie and the buttons on the jacket. When the bow-tie is set, add the dot.

Secure the silver fabric around the pyramid while the chocolate sets. Create the pyramid starting by the bottom row and always try to pack the strawberries as much as you can. Add the bride and groom on top and store in a cool place, but I would not recommend to store it in the fridge otherwise the strawberries will shrink and the chocolate will break easily.

DSCN6307

Bergamot and Amalfi Lemon Marmalade

IMG_1617

My friend Katy showed me this amazing online food website called Natoora. I am sure you will hear more about it in future posts, but today it is all about citrus fruits. Natoora does what supermarkets don’t, they provide top quality, fresh but most importantly, seasonal products. So don’t try to order raspberries in March because it just won’t be there. Winter months are the best for citrus fruits and their list of Mediterranean, especially Sicilian, citrus fruits took me by surprise and I found myself with that urge again: making more marmalade!

IMG_1598A citrus, with an unique smell which you will recognise as soon as you smell it, is Bergamot. I bought two along with some Amalfi unwaxed lemons, a Cedro (the big lemon cut in half in the picture above) and some blood oranges. I decided to make a lemon marmalade infused with Bergamot. I wanted a bright yellow colour and wasn’t sure about the lemon pectin content. Amalfi have an amazing thick skin, but very little pips so I decided to use some sugar with added pectin, just in case.  This marmalade turned out beautifully and just the way I imagined it, it is my favourite so far this year!

Ingredients:

  • 1 bergamot
  • 5 Amalfi lemons (or enough to have a total of 700g of fruits)
  • 700g granulated sugar
  • 700g of jam sugar

In the evening, wash the fruits well, chop the bergamot in two and leave the lemons as whole. Place them in a pan and submerge them with water. Bring to the boil and then simmer for at least 1h, or until the fruits feel soft. Leave it overnight to cool and infuse.

The next day, remove the fruits and measure the cooking water left. You need double amount of your total fruit weight, 1.4L here. If too much liquid, reduce it a bit more by bringing it to the boil once more, or simply add some more water if you don’t have enough. Chop all the fruits in half and with a spoon remove the flesh from the skin and place the flesh and pips onto a muslin sheet. Chop the lemon in fine strips and blitz the bergamot peel to have little cubes instead of whole strips of zest. My first batch tasted amazing until I spooned a zest from the bergamot onto my bread and ate it… let’s say that the taste coming from a whole strip is a little too potent to be chewed on. Basically, keep the bergamot pieces small.

IMG_1603

Tie the muslin bag very tightly and squeeze it into the pan as long as there is still liquid oozing out of it. This is definitely the most satisfying part. This gluppy opaque liquid is packed with pectin and will set your marmalade, so you don’t want to be in a rush and enjoy the experience fully. Your hands will be covered with the stuff and you might even have to wash them in the liquid not to waste anything. Add the sugar and the chopped fruits and turn the heat on to maximum. Mix well to start with to dissolve the sugar properly, then let it boil until it reaches 105C. From that point, keep in boiling for 15 minutes. Have a wooden spoon ready in the freezer and spoon a little of the liquid on it to test the setting point. This marmalade was done after 15 minutes. It’s fast and efficient when you add a little more pectin and it means that the marmalade won’t loose its colour too much. Leave the marmalade to rest for a few minutes while you prepare your jars.

Fill clean jars up to the top, add the lid on tightly and invert on a heatproof surface. The second best part of this is to label the jars and stack them up into the pantry!