“Baking your own bread is so rewarding, it will taste better than shop-bought bread …” blablabla. Baking bread for me involved weeks of trying, failing, reading and sitting in front of the oven waiting for that “oven push” that never happened. I must say I learned quite fast for basic white sourdough bread, but when it came to Rye bread I thought I would never stop producing bricks after bricks. And I am not even talking about a 100% Rye!… this one might take me the rest of the year to master properly…
My learning started with watching Paul Hollywood’s Bread series. That was a real help to actually see someone handling the dough and have an idea on the texture. Through his books and Dan Lepard’s I started to master the basics and accumulates some tips such as spraying the bread with water before baking, using a pizza stone, adding moisture in the oven etc… However, there is one thing that is FUNDAMENTALLY different in the way I prepare my bread= my mixer. My beautiful and strong mixer, with its attached dough hook is a gift from heaven. I know some women fancy these strong men kneading the dough on TV, but I am small and I definitely struggle to knead a dough that weights 1kg (or even 500g) for 10 minutes!
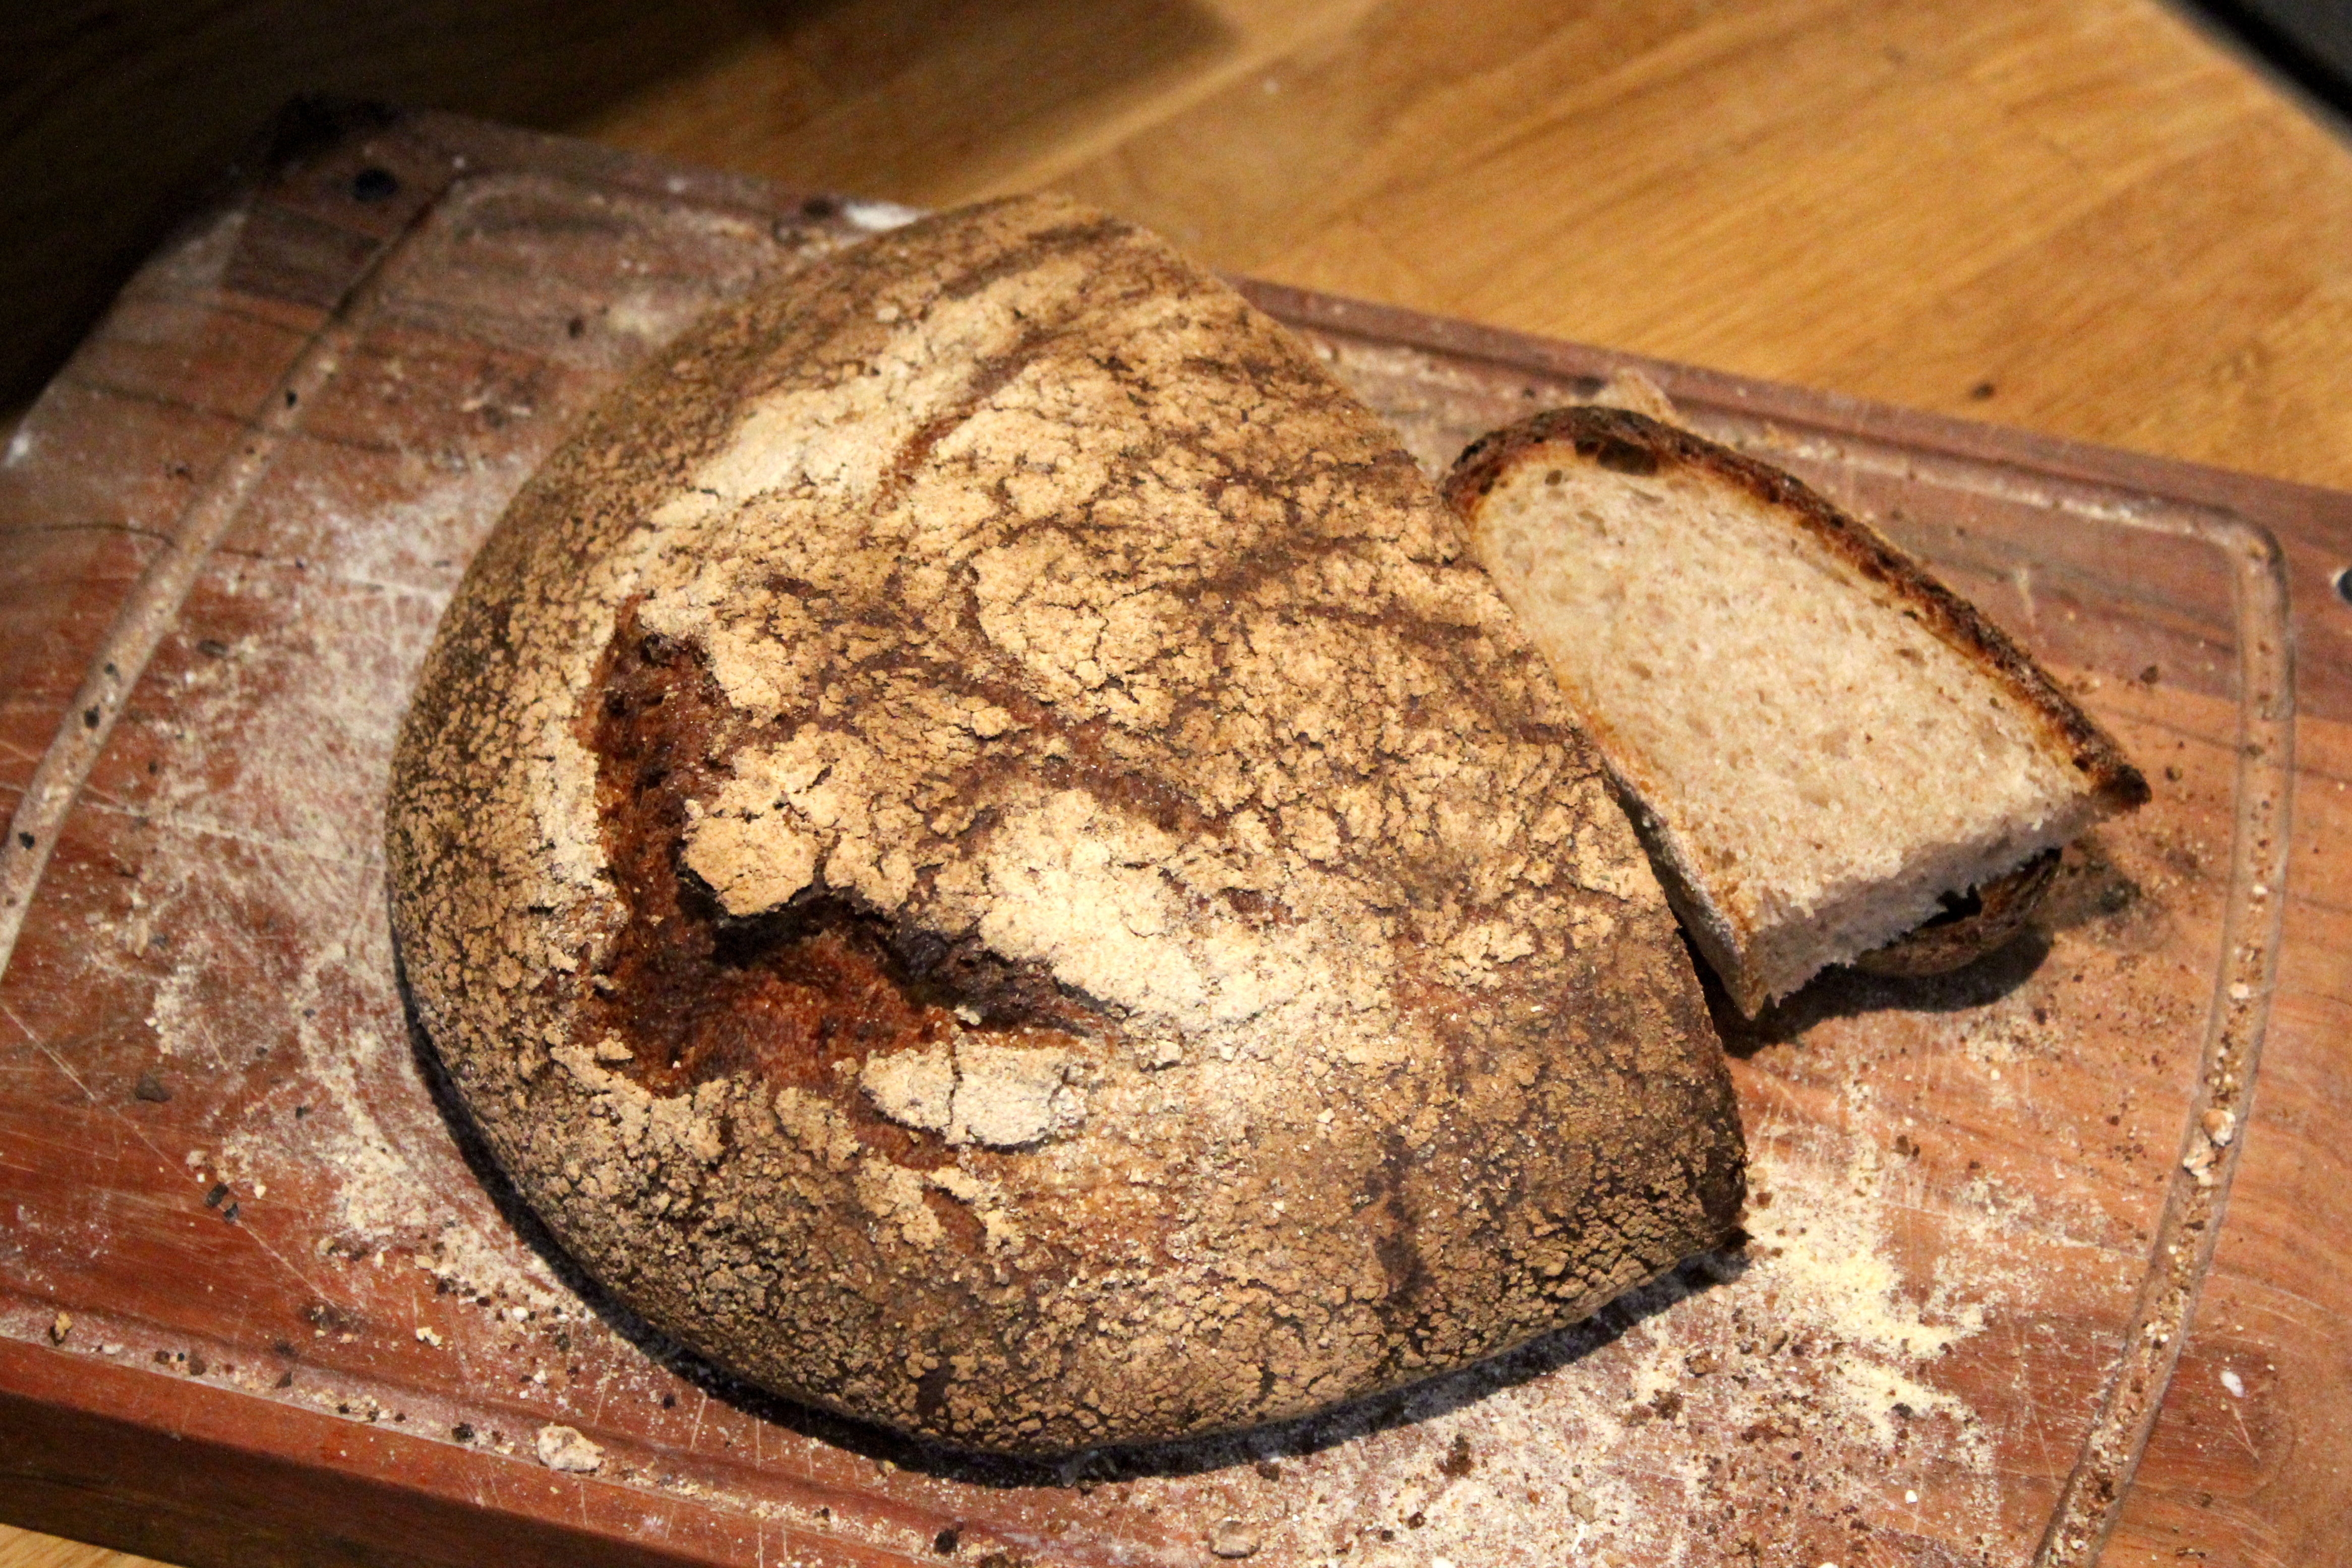
So let’s talk about Rye… Rye flour adds a rich nutty taste and a rustic style to the bread with a very attractive dark crust. The reverse of the coin is that Rye is low on gluten, the dough always feels quite dry and is much harder to work on. Dan Lepard explains in his book the importance of ratio between different flours and white flours, amount of salt and starter, wet or dry dough…This helps to understand what to modify if you’re producing bricks, even after following his own recipes!
Below you will find the recipe I ended up using to produce my beautiful Rye Bread. I made sure to try different proofing variations: at room temperature, in the fridge (or even both) to fit into everyone’s schedule. See below for the different schedules I have tried.

Ingredients
- 90g Rye starter
- 160g White flour starter
- 400g strong White flour
- 100g Rye Flour
- 1 and a half tsp salt
- 275g water
Add all the ingredients to the mixing bowl and mix at low speed for 2 minutes to combine the ingredients. At this point I remove the bowl and make sure that the ingredients are well combine by scraping any pockets of flour left at the bottom of the bowl. Now the mixture is ready to be kneaded, by the mixer! On my mixer (Bosch), I use speed 3 for 10 minutes, any faster than this and my mixer comes to life and jumps off the worktop. After 10 minutes, the dough should be a nice soft ball, but still a bit sticky: this is hand-kneading time. It never takes too long and I think it’s good to develop a “feel” for the right dough. Kimberley from the Bake Off was testing the development of the gluten by stretching the dough very thin. But with Rye flour, it doesn’t quite work the same way. I can never stretch this dough much, but you can feel when the dough forms a skin and is very elastic. It usually takes a few slaps on the worktop with a bit of flour.
Then, oil lightly a clean big bowl and leave the dough to rise (see schedule below). I always thought that the more the bread rises at the first proofing, the less it will rise during the last proofing. This is completely wrong for Sourdough bread. Sometimes you wake up with a doughy alien that is crawling on your worktop after the first proofing but there will still be plenty of active yeast for the second proofing. It all depends on the “knocking back” step. Flattening the dough after the first proofing and removing all the air bubbles seem to rejuvenate the yeast and push it to grow again. Then shape the dough…which I am still learning how to do properly. I flatten the dough in a squarish shape, then I fold the corners on the inside, transfer the dough in a basket (heavily dusted with Rye flour) exactly the way it is and push down in the middle to fuse the corners together. Leave to rise until it has at least doubled in size. Now, if the dough was in the fridge for the last proofing I usually leave it there until the oven is hot. If the dough was rising at room temperature, I always transfer it to the fridge for a few hours. I found this helps to have a firmer skin to prevent the dough to loose its shape when turned upside-down.
Put a empty tray at the bottom of the oven and heat the oven to 240C. Make sure to have all your tools ready. Putting the bread in the oven is the most stressful time, this is usually why I collapse in front of the oven once the bread is loaded, incredibly tiring job!
In order:
-Turn the bread onto tonnes of semolina to make sure the transfer to the cooking stone happens smoothly, and rapidly. I have a pizza shovel which works great.
-Slash the bread but BEFORE –>My secret weapon: use a ring from a cake tin to put around the bread. So many times I perfectly flipped over my beautiful and promising bread, made amazing slashes and as soon as it hits the oven, it starts to spread sideways and I end up with another flat brick. The ring will keep the bread together after you made the slashes and will force it to rise upward. It works every single time, sitting in front of the oven isn’t a tearful event anymore.
– Spray water on top of the bread to create a beautiful crust
– Open the oven door and fill the hot tray with water, quickly not to loose too much heat
-Then QUICKLY shovel your bread onto the stone and close the door
-WOW you’ve done it, reduce the thermostat to 220C and have a sit. The first 15 minutes are the best.
-after 20 minutes, open the door and take the cake ring out
-Cook for another 35 minutes: so about 55 minutes in total
Schedule 1 (easiest for full time workers)
- Make dough in the evening and let it proof overnight at room temperature (8-9h)
- Next morning, knock back, shape, place in basket and let it prove in the fridge all day until ready to bake (12h)
Schedule 2 (perfect for a lie in at week ends)
- Make dough in the evening, let it proof 2h at room temperature then transfer to fridge until needed (not longer than 24h)
- usually the next day before noon, knock back and rise for 4/5h at room temperature. Bake for your evening BBQ with friends 🙂
Schedule 3 for a very sour bread taste
- Make dough and let it rise in the fridge for 12h
- knock back and rise again in the fridge until doubled in size for 12h then bake


Delicious!! 🙂